Would you like to embed a slideshow directly inside of your blog post? Not on the slide as a gadget, but right inside of your post? This post discusses exporting images from iPhoto into a Picasa web album and then embedding a Picasa web album slideshow into a blog.

Before you can export images from iPhoto to a Picasa web album, you need do two things:
- You need to to download and install the Picasa Web Albums Uploader. (http://picasa.google.com/mac_tools.html)
- You need to create a Picasa account. You will be prompted to do so after installing the Picasa Web Album Updater.
After you have Picasa Web Albums Uploader installed, you use the following directions to embed a slideshow right into your blog post.
 DIRECTIONS
1. Download your photos into iPhoto
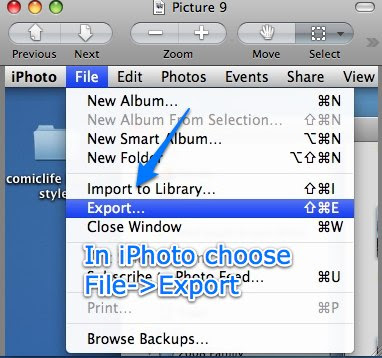
2. Choose images to export, then select File→Export
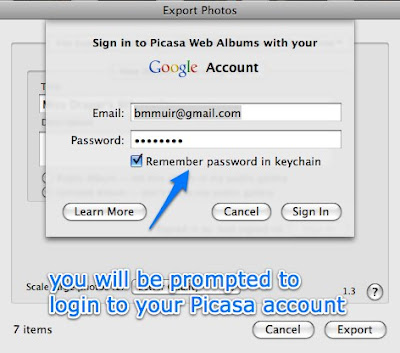
3. You will be prompted to sign onto your Picasa Web Albums account
4. Click on Export to export the album to Picasa Web Albums.
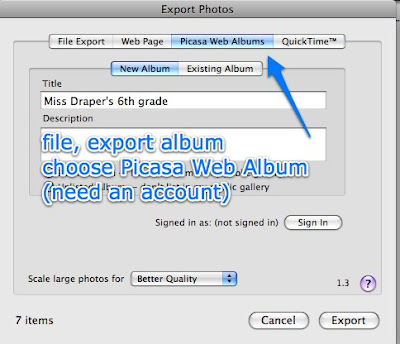
- You will be prompted to name the album and to choose to export the images to a new or existing Picasa web album.
- You can edit the album in Picasa Web Album (album properties (private or public) album name, captions, order, delete, etc)
5. Choose an album, click “Link to this album”
 (Click on the image to see the largest version)
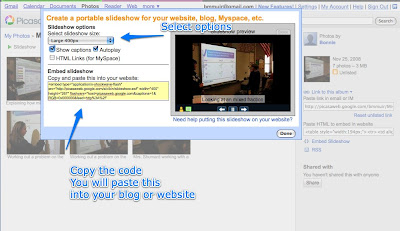
6. Click on “Embed Slideshow
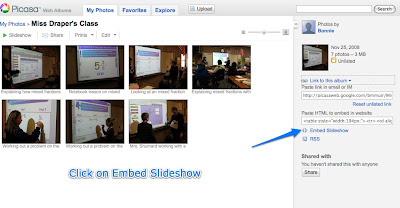
7. Select viewing options, Copy the HTML code that Picasa generates
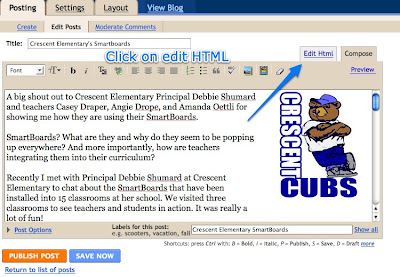
8. Create a blog post, click on Edit HTML
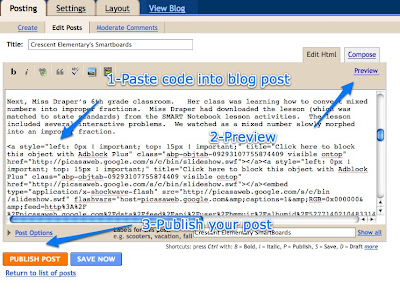
9. Paste code, Preview, Publish.
 Special Note:
 I keep my images of students in private web albums, not public. You can choose the option to store in a private or public web album each time you upload images to your Picasa web albums.


 9. Paste code, Preview, Publish.
 Special Note: I keep my images of students in private web albums, not public. You can choose the option to store in a private or public web album each time you upload images to your Picasa web albums.
